Thursday, July 27, 2017

7 Ways to Make Building a Home Less Stressful

10:58 AM Laura Tedesco


I intended to blog about building our home every step of the way. But then things got STRESSFUL.

As my sister said, “I always heard that if your marriage can survive building a house, it can survive anything. I never knew why—until now.”

The mistakes, the setbacks, the costs—it’s a lot (especially when, in the meantime, you're living in a ridiculously expensive, yet tiny, third-floor apartment with a toddler). My realtor tells me it’s normal to have a long list of fixes toward the end of construction, and my husband says, after 13 years of dealing with contractors at work, he's learned that mistakes are the norm. 

But still: Walking into your house and seeing your kitchen pendants hanging out in la-la land, nowhere near centered over the island, is troubling. As is discovering that your garage doors have been stained the wrong color. Or that your crazy-expensive marble bathroom tile—the splurge item you were super-pumped about—looks like your toddler laid it. 

Ugh.

Only two weeks to go! 

So would I build again? Yes—but next time, I’d be armed with these seven tips for making the process go a little more smoothly (and keeping my mental health intact):

Expect mistakes. It’s not a matter of if—it’s a matter of when. So walk through your house with a critical, unemotional eye, almost like you’re a home inspector, not a home owner-to-be. That way, you’ll be able to flag mistakes without getting flustered.

Walk your house regularly. Because our builder is working on a handful of houses, he isn’t visiting ours on a daily basis (like I think he should be!). That leaves the walk-throughs up to us. When you visit, bring a print-out of your selections along to compare what’s been done with what you chose (hint: during the selection phase, photograph everything!), along with a measuring tape and a camera. Taking pics of mistakes makes it much easier to show your builder where the issues are.

Don’t stress over the small stuff. Builders hate when buyers bring up the little stuff—wall dings or a drip of paint, say—because these things WILL be fixed. You don’t need to point them out, unless, of course, it’s closing day and it still hasn’t been repaired. Save your complaining for actual errors: incorrect colors, for example, or poor workmanship (as with my bathroom floors).

Don’t assume anything is correct. When I was signing off on my selection sheet (the document that lists every finish and fixture), I focused my attention on the items I’d upgraded: Was the tile the one I’d chosen? Did they remember to paint the master bath cabinets dark gray? As a result, I missed an error: While the rest of my faucets are brushed nickel, the one in my laundry room was listed as chrome. So now I have a chrome faucet in my laundry room—because it was my fault that I didn’t double-check the finish.

Don’t skip the home inspection. Every inch of our house is under full warranty for our year, so we figured we’d have the home inspected after six months, once it had settled. But then we talked to our soon-to-be-neighbor, who found that getting the builder to make repairs after closing was much more difficult than before. Now, we are going to have our home inspected before closing, ensuring any repairs are completed before we've signed the papers.

Communicate via email. Yes, face-to-face meetings or phone calls are more personal—but emails give you evidence. If there’s a dispute with your builder about what was decided, or who promised what, it’s always helpful to have a paper trail. 

Find joy in the small things. If I’m making this process sound like three months of torture, it kind of has been—but I’ve still tried to keep my emotions in check: I’m lucky to have the chance to build exactly what I want. With that in mind, I’ve tried to find joy in little things along the way: The landscapers planted four trees instead of the expected three! My herringbone floor turned out exactly as I envisioned! My neighbors are super nice! Bottom line: Don’t let the mistakes steal the joy from your dream home. 

Wednesday, May 17, 2017

Destination Dallas: Construction Update!

2:46 PM Laura Tedesco


We had a meeting with our builder last week, and he had some good news: Our house has officially reached the halfway mark! The framing is done, the electrical inspection happened yesterday, and the insulation will start going up on Friday. So far, the progress has seemed slow, with few changes each visit, but that's because the work has been mostly electrical, which doesn't exactly have the visual wow factor (except for Frank). 

Even so, it's fun seeing the house built from the ground up. 


One feature of the house that we loved was its two garages. It's not uncommon to have space for three cars in Texas garages, but often, they're what's called a "tandem" garage, where one bay is extra deep, allowing you to park two cars one on side. I much prefer having two separate garages, one with two spots, another with just one. We plan to use the single-car garage for Frank's workshop, unless, of course, I prove incapable of swinging my SUV into the two-car garage. 


For me, the interior's the most exciting part. Walking through the framed-out house, I have been able to get a better sense of the layout and the scale of each room, which allows me to imagine how I'll place my furniture (and decide what new pieces I need!). 


The photo above is a couple weeks old, but it shows the study, which is right off of the foyer, through the double door opening on the left. There's also a guest bedroom with a bathroom, a mudroom, laundry room, and a powder bath at the front of the house.

I was initially a little skeptical of the octagonal foyer, but now that I'm seeing it underway, I love it! It's spacious, unique, and will be the perfect showcase for my herringbone wood floor.


As you go deeper into the house, there's the dining room on the left, as well as a media room, a windowless space designed for a projector screen. The rest of the rooms have huge windows, one of my favorite parts of the house, to let the bright Texas sunshine in!

Study on one side, dining room on the other.

The pipes sticking up on the left are where the kitchen island will be. Frank is walking through the eat-in kitchen area. 


Although this picture is a little dark, you can see my favorite features in our living room: the cathedral ceiling and wall of windows. The next photo is of the same space (looking toward the kitchen), but much brighter!


It seems I forgot to photograph the rest of the house, so I'll have to save that for the next update! 

Monday, May 15, 2017

4 Ways to Maximize Your Magnolia Market Visit

2:43 PM Laura Tedesco
That's the store on the left, the bakery on the right.
My husband predicted we’d be in Texas only two weeks before we visited Magnolia Market. (For the uninformed, this is the shiplap-packed mecca of Joanna and Chip Gaines from HGTV’s mega-hit Fixer Upper). As it turns out, he was only off by a couple days—Mother’s Day happened to be just shy of two weeks after our move, so we decided to make the 90-minute drive to Waco this past Saturday. (Magnolia is closed on Sunday.)  

A map of Magnolia. Silos, store, and bakery up front; play area in the middle;
food trucks and garden center in the back.
We found free street parking surprisingly quickly (we arrived at around 10:30 a.m.), and I made a mad dash for the Silos (which, funnily enough, my husband remembers seeing in a much different—i.e. decrepit—state when he worked in Waco almost a decade ago). I was surprised by the size of the campus—there really isn’t much to it, although every inch of the place is impeccably decorated and well thought out. 


Entrance to the store.
I started in the shop, which was totally packed with people. (I soon found out that, in addition to being Mother’s Day weekend, it was graduation weekend at nearby Baylor College.) Overwhelmed, I mostly just absorbed the scene, rather than doing serious shopping, although I did pick up a pack of hymn postcards (available here).


I loved this subway tile wall in the store!


 The line snaked right through the center of the store, making it tough to browse, but I did notice all of the usual Joanna Gaines suspects for sale.


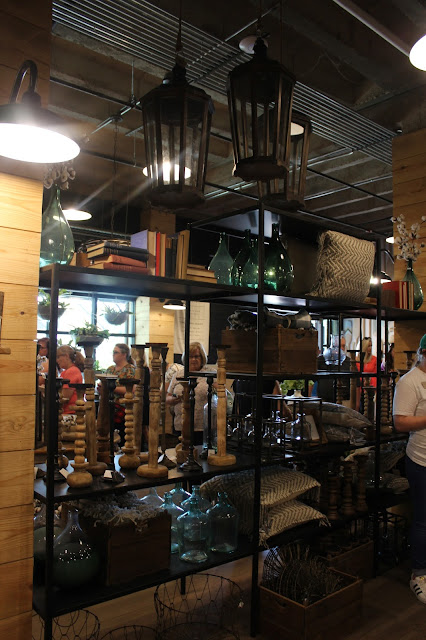
Candlesticks by Clint:


And metal signs by Jimmy Don:

After I finished shopping, we let Asa play in the Astro-turf area, where there are comfy striped seats, swings, and bins full of toys, including Frisbees (I got hid in the head with one). 


Then we meandered over to the food trucks, the mix of which is constantly changing, and I stood in the searing-hot Texas sun (I could literally feel my toes burning) for about 15 minutes to buy a cupcake out of a refurbished Airstream camper. I chose the Nuts and Bolts flavor, which consists of vanilla cake speckled with walnuts and pecans and topped with cream cheese frosting. It was certainly tasty, but I probably should have gone with my first food instinct: a gourmet grilled cheese from Cheddar Box. (Note: I walked by the bakery, which also sells cupcakes, but the ridiculous line deterred me from checking it out.)


I was disappointed to learn that you can’t actually go inside the silos (although if you’re dying to tour one, you could drive down the road to the Waco highway rest stop, which has silo-shaped bathrooms!). 


That said, I will definitely be going back when friends and family come to visit—and next time, I’ll be armed with these insider tips:
  1. Plan a mid-week visit. Not surprisingly, Saturday is the Silos’ busiest day, but a store clerk told me Monday is also insane. (She said they consider Monday part of the weekend, since they’re closed on Sunday.) The best time to visit? Wednesday around 3 or 4 in the afternoon, when the weekend crowd has dispersed and the day is winding down.
  2. Don’t wait in line. If you’re buying non-breakable items—like postcards or a t-shirt—look for a store clerk holding an iPad, who can ring you up and spare you a crazy-long wait in line. 
  3. Check your inbox. See a lot of items you love? Buy something small that you can easily carry in your suitcase, then write down the names of bigger items you like and order them online later. After making my purchase, I received a 20% off coupon for online items (most items for sale at the Silos are available on the website), which allows you to save a little money and avoid the cost and hassle of arranging shipping while you’re in the store. 
  4. Drive around back. As you approach the Silos from the highway, you’ll see church parking for $10. But if you keep going, you’ll find free parking behind Magnolia Market. It may be full if you visit at a peak time, but it’s worth a try! 

Next post: All the other must-see Waco sights! 

Thursday, May 11, 2017

Destination Dallas: Designing My Dream Home (Part 2)

8:22 PM Laura Tedesco
My inspiration photo. (Credit: homedecorify.com)

Let me start by saying: I am SO excited to have a real master bath. At our first house, we technically had one, but it was tiny and far from luxurious, unless you consider a handicap-accessible shower fancy (the previous owner was in his 90s). (It also had magnificently ugly iridescent wallpaper that I ripped down when Frank was out of town.) Our next house wasn't much better: Since it was built in the early 1900s, the bathrooms were all small, which meant we had a massive master bedroom...and a tub barely big enough for a toddler.


The rooms featured in this post are highlighted in yellow!
So when I chose the plans for our new house, I was stoked to see two sinks..and a soaking tub...and walk-in closets! We are finally going to have a true master suite, which means I was willing to devote a sizable chunk of my budget to this space.


The hex tile at the bottom left is our flooring.
I started with the flooring and worked my way up. I knew right away what I wanted, thanks to years of fantasizing about a no-holds-barred master bathroom: gray marble hex tile. I was surprised to find that the marble flooring was only a few hundred dollars more than the similar ceramic hex tile, so I was able to spring for the more luxurious option. For our shower, which has a frameless glass surround, I picked a classic white subway tile with light gray grout. 


The cabinets will be painted dark gray, Sherwin Williams Pewter Cast, which will contrast nicely with the white quartz countertops I selected (see the photo above). I chose brushed gold light fixtures at the lighting center last weekend (and will eventually install gold hardware, something our builder's design center doesn't offer).


Speaking of lighting...I have two words: rude awakening.

I quickly discovered that the budget we were given for lighting would only cover the cost of a basic package (which includes underwhelming, under-sized light fixtures), and upgrading didn't come cheap. I spent the entire allotted amount on only a few spaces: the kitchen island, outdoor patio, all four bathrooms, and the foyer. To save money (and to buy me time to find fixtures I actually like), I'm having the builder install dangling light bulbs in the remaining rooms and will have Frank install fixtures as I find them elsewhere. (The lighting center featured a lot of traditional fixtures in silver and bronze, replete with rod iron curlicues, which is totally not my style.)


The whole point of this aside: The cost of building is never what you think it will be. We've literally been hit with upcharges every step of the way (just yesterday it was for sliding shelves for pots and pans in our kitchen), and I am so grateful this house wasn't at the very top of our budget. The unexpected expenses are crazy (and, I'm guessing, a normal part of the process). 


I loved the 100-year-old clawfoot tub (in Asa's bathroom) at my last house,
so I was hoping to install something like this. (Credit: planete.decor.fr)
Speaking of which, let's talk about the tub. One of my bathroom pet peeves is jetted, Jacuzzi-style tubs, probably because they reek of the 90s (and, also, because they quite literally reek: I once had a hotel Jacuzzi blast me with smelly stuff. I choose not to think about what it was). I've always envisioned a freestanding soaking tub in my dream master bath, and figured it'd be no issue to install one. Wrong. I was told it'd be a $10,000 upgrade. 

Apparently, a freestanding tub has to align perfectly with the drain, whereas there's more wiggle room (and thus less installation cost) with a boxed-in tub, making it a more economical choice. (Note: I've since been told the $10,000 was probably high, more of an attempt to discourage us from making the change than anything.) Since this is probably not our forever home, I decided to stick with the standard tub, which thankfully, isn't jetted! I picked the marble-look tile (in the image with the marble tile flooring above) for the deck. 


My tub will have a paneled surround, like this one, with a marble-look deck.
(Credit: astrollthrulife.net)
The mirrors have a dark gray frame, which I may be spray painting to match my fixtures. (I'll wait to decide once I see it all together.)

Inspiration for Asa's bathroom. (Credit: stylemepretty.com)

Asa's bath is a Jack-and-Jill design, with two sinks, opening to two separate bedrooms, one of which will be hers, and the other, her playroom. Since this bathroom is a child's space, I decided to have some fun with the design and picked a patterned tile for the flooring. The tiles are dark, so I chose white cabinets and a dark gray quartz countertop. The selection of gold bathroom lights was limited, compelling me to use the same one I chose for the master.


The tile flooring, plus the dark gray quartz countertop.
When Frank enlarged the floor plan so we could review the electrical components, I noticed that the doors between the sinks and the bedrooms were actually just cased openings. This wasn't going to work with a toddler (I could just envision nighttime sink splashing), and even though the walls had already been framed, my builder was kind enough to make the switch for free. Crisis averted! 

I had originally planned to use subway tile behind Asa's bathtub, assuming the ubiquitous white tile, with its 50 cent price tag at Home Depot, would be an inexpensive option. Yet again, I was wrong; it would have cost me almost $700. Because her bathtub is tucked away and not a focal point, I opted for the builder grade option, which is basic square white tiles.

The standard-issue mirrors are frameless and glued to the wall. I knew I didn't want these so I told the builder to leave the walls above the sink blank. I purchased a pair of round gold mirrors that I'll hang myself:


Next time: the other two baths!


Friday, May 5, 2017

My Restoration Hardware Warehouse Sale Bargain!

2:28 PM Laura Tedesco

Frank and I had been in Texas only a few hours when I spotted it: the RH Warehouse Sale sign. At first, I was super-bummed, because the Restoration Hardware website said the sale had ended the day before. I couldn't believe my bad luck. But then! The mall website informed me that, due to popular demand, the sale had been extended. Rejoice!

It's held only on Friday-Sunday, so I waited patiently all week to storm the warehouse.

The movers misplaced our stroller, which means I've been battling a free-roaming toddler all week. But I desperately wanted to go to the sale, so I decided to say a prayer and hope for the best. Asa and I arrived a few minutes before 10 a.m., when the sale started, and there was already a line out the door. 

Once they allowed us to stampede inside, I quickly learned how the system works: stand by items you want, wave maniacally, and wait on a sales clerk to fill out a purchase form, which you take to the register with you when you're done (the item gets tagged as claimed). 

Super-gorgeous velvet tuxedo sofa, priced at $2,903 (65% off retail).
Priced at 65% off, this Chesterfield chaise was $1,258.

Within minutes of the sale starting, I saw a crowd of people waving like they were trying to board the last Titanic lifeboat, so of course, I joined them. Turned out to be a smart move: They were crowded around the coveted X-back cane dining chairs and stools. I need stools for my new house's kitchen, so I plopped Asa in one and guarded two more until the clerk made his way to me. Luckily, I went in knowing I liked these chairs, because I didn't have time to think. The chairs retail for $195 each, and they were marked down to just $39. No brainer!

An army of X-back chairs. Oddly, the table-height chairs were pricier, at $46 each, than the stools.
I wasn't able to fit much more in my car, and our house isn't going to be finished until July, which means I had to limit myself to the stools. Somehow, I don't think my husband would be thrilled if I made him haul an oversized sectional into our already packed third-story apartment! The sale is going on until July, so I will definitely be back. (There are other locations, typically in California, Texas, and D.C., throughout the year.)

Armchairs were among the last items to be claimed.
Headed to a sale in your own city? Here's my advice:

Arrive early
I naively sat in my car before the sale, not wanting to wrangle my toddler for more time than necessary. So when we walked in five minutes before it started, there was already a massive line. If you're serious about being among the first, arrive early and go ahead and take your place in front of the entrance. While you wait, ask for one of the purchase forms and fill out your personal info ahead of timethat way, when you find an item, the clerk won't have to do this and slow you down from checking out the rest of the sale. 

Come on Friday
The sale lasts (and is restocked) all weekend, but a clerk told me the best items are usually on the floor on Fridays. I plan to check back later in the weekend, though. 

Target your search
The items that seemed to be claimed the fastest were dining chairs and tables. (Just after I walked in, I saw one of RH's amazing trundle tables for only about $550, but it had already been claimed). Save sofas, dining room cabinets, and beds for last; when I walked around toward the end of my time in the warehouse, there were still several of these left unclaimed. 

Know the bargains
The sale advertises that items are priced at 65-90% off. It seemed that most items were between 65-70% off, but according to one of the store clerks I spoke to, dining chairs and cushions for outdoor furniture are most likely to be deeply discounted. Thus my $39 dining stools.

Come with a truck
You only have until 7 p.m. on the day of your purchase to pick up your items. I was able to cram my stools into my SUV, but I would have either had to hire the on-site delivery service or come back with a truck if I'd found more. I'd suggest planning ahead and coming with a large vehicle or U-haul if you anticipate making a big purchase.

Wednesday, May 3, 2017

The Scientific Way to Pick the Perfect Gray Paint

1:40 PM Laura Tedesco


Yes, gray is trendy, and trends change. But my love of gray is not an attraction that’s likely to fade: Way back in the early 2000s, when my best friend and I were aspiring (i.e. 12-year-old) interior designers, we’d often fantasize about painting a dining room gray. Back then, no one had gray walls—everything was that hideous shade of faux-Mediterranean yellow-gold—and even now, more than a decade later, I stand by my preteen design impulse. In my book, gray is always a go, no matter how trendy (or not) it is.

Problem is, as gray has grown in popularity, the number of paints to pick from has proliferated. So how the heck do you choose the right gray for your walls? 

Gray works in every room; the challenge is deciding which shade of gray is best! (Photo: GreigeDesign.com)
Even if you narrow your selections down to one manufacturer—we prefer Sherwin Williams in our house—you still have a litany of options, which all start to blur together (or to look like another color entirely, like lavender or beige). 

The solution: Use science to help you decide.

In researching wall colors for my new home, I came across an interesting (and helpful) concept: light reflectance value (LRV). It’s something listed on the back of paint swatches, which is, admittedly, a place I’ve never bothered to look. The dumbed-down definition of LRV? Basically, it’s how light or dark a color is, a factor determined by how much light the paint absorbs.

(Photo: TheLandofColor.com)

The breakdown: Black absorbs all light, so it marks one end of the LRV scale (0% LRV), and white, which reflects all light, represents the either end (100% LRV). Every shade of gray lands somewhere in between. What that means: If you want a cozy, darker-feeling space, a low LRV paint color is ideal; for a bright and airy vibe, higher LRV is the way to go. 

Here are the LRV values of some bloggers’ and designers’ favorite grays, ranging from light to dark:

Benjamin Moore Horizon

Living room painted with Horizon by Braun + Adams Interiors (Photo: InteriorsbyColor.com)

LRV: 73

Described by Donna Peay, the writer behind the A Perfect Gray blog, as “a beautiful light gray with just a hint of blue,” this shade is certain to brighten up (and cool down) your space.

Benjamin Moore Graytint 

(Photo: KarenHealeyStables.com)
LRV Value: 69

Not too dark, not too light, Graytint is perhaps the definition of an unassuming gray. 

Sherwin Williams First Star

(Photo: VeronikasBlushing.com)

LRV Value: 69


This barely-there gray is the perfect choice for a room in need of a light touch (like the soothing nursery above!).

Sherwin Williams Silverpointe 

(Photo: Houzz.com)
LRV Value: 64

I had this medium gray all over my previous home: in my second and third story hallways and my daughter’s room, where it was paired with Rhinestone (a whitish-gray) for subtly contrasting stripes. 

Sherwin Williams On the Rocks

(Photo: houzz.com)
LRV Value: 62

I chose this medium gray for my new home because of its cool undertone (my builder's interior designer described it as having a slightly blue tint), which pairs well with my furniture. 

Sherwin Williams Agreeable Gray

(Photo: houzz.com)
LRV Value: 60

More greige than true gray, this color is an effortless neutral that blends with almost any color palette. It’s used in my builder’s model home. 

Sherwin Williams Silver Strand

(Photo: HouseofTurquoise.com)
LRV Value: 59

A favorite of Joanna Gaines, Silver Strand has just a hint of green to it.

Sherwin Williams Repose Gray

(Photo: Painter1.com)
LRV Value: 59

Another Fixer Upper regular, this beigey-gray is where the scale starts to skew toward the dark side.

Sherwin Williams Mindful Gray

(Photo: HomeBunch.com)
LRV: 48

Think of this as the darker cousin of Repose Gray (Jo-Jo has been known to use both!). As Thistlewood Farms blogger KariAnne Wood describes it: “This is the gray that trumps all others when you just don’t know where to turn. It’s the perfect not-too-green-not-too-pink gray." 

Sherwin Williams Dorian Gray

(Photo: kylieminteriors.ca)
LRV: 39

This gray is on the darker side of medium, with a slightly greige undertone.

Benjamin Moore Dior Gray

(Photo: homebunch.com)
LRV: 22

Interior designer—and Oprah favorite—Nate Berkus has called this dark gray his fail-safe shade, for its elegance and classic appeal.   

Farrow & Ball Down Pipe

(Photo: moderncountrystyle.blogspot.com)
LRV: 13

Farrow & Ball describes this shade as a “dark lead gray” with blue undertones. Perfect for a moody library.

Benjamin Moore Cheating Heart

(Photo: caitlinwilsondesign)
LRV: 9

This charcoal gray will make a bold statement on your walls or help draw the eye to little details, like the legs of a clawfoot tub, as designer Jen Going suggests.